
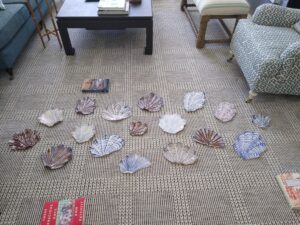
ILevel hangs an enormous amount of framed works of art every year. While we love every chance we get to create amazing grids and gallery walls of framed pieces, it’s a treat when a different kind of project comes along. Take this wall of decorative plates, for example.
These plates might suggest shells, fans, or feathers. Whatever they look like to you, they are too pretty to be used for dining, and are begging to be displayed rather than tucked away in a cabinet. Here’s how we created this wall of decorative plates.
Step One: Design
First we measured the wall space, and created an equivalent space on the floor using books as boundaries. Within these boundaries, we began to play with different arrangements. This is where our design sensibility kicks in. The client asked for a “balanced, yet not planned look.” We achieved that by mixing plate colors, sizes, and the orientation of the plates on the wall.
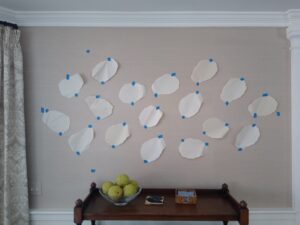
Step Two: Prototype
Next, we made paper plates. These were taped on the wall to help us visualize our design, and to assess the spacing between the plates. Because the plates are not uniform in size or shape, measuring is a challenge. Creating a prototype design like this is a key step.
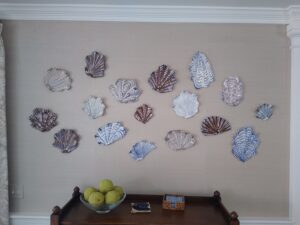
Step Three: Installation
And now the good part: the installation. These plates came with custom plate hangers attached. They work well to secure the plates to the wall, and they aren’t visible. For each plate, we measured the distance from the top of the plate to the plate hanger, then nailed a hook into the wall on the paper plate. Then, we removed the paper plates and hung the real ones. After some final adjustments, our wall of decorative plates was complete.
For a peek at another wall of decorative plates hung by ILevel, take a look at Martha Stewart’s blog.
If you’re inspired to pull out your decorative plates and hang them, we’re happy to help. Give us a call at 212.477.4319 or email info@ilevel.biz.